Tuesday, April 5, 2011

Plastic Lid Bunny Wreath

A few months ago I started a changeable wreath for our front door. The kids and I just got it ready for Easter. I cut the edge off two large 64oz plastic yogurt lids and cut out simple bunny shapes. Basically, a figure eight with ears. I cut 3 bunnies from each lid and made them various sizes. Hollin decorated their faces with colored sharpies. Waylon helped me cut ribbon. The ribbon just loops through the twigs and ties around the bunnies' necks, securing them to the wreath and giving them a bow tie at the same time.

I am very hoppy with the result (I could not resist).

Tuesday, March 8, 2011

The Days are Getting Longer


I spent every spare minute last month working on this oil painting. It is pretty big, 36" by 40". I suppose it is my interpretation of February in Fairbanks. Still so very cold and still, but the light is incredible. It is the month where, after so many months of cold and dark, you start to get a glimmer that spring may actually return. It is still cold, but the days are noticeably longer.

I will never tire of painting the trees in interior Alaska. Even around our 2 acre yard, the inspiration is limitless. The aspens and birches are all so unique and they change dramatically depending on the weather, the time of day and of course the seasons. I love to wander around and look for my next painting.


Saturday, February 26, 2011

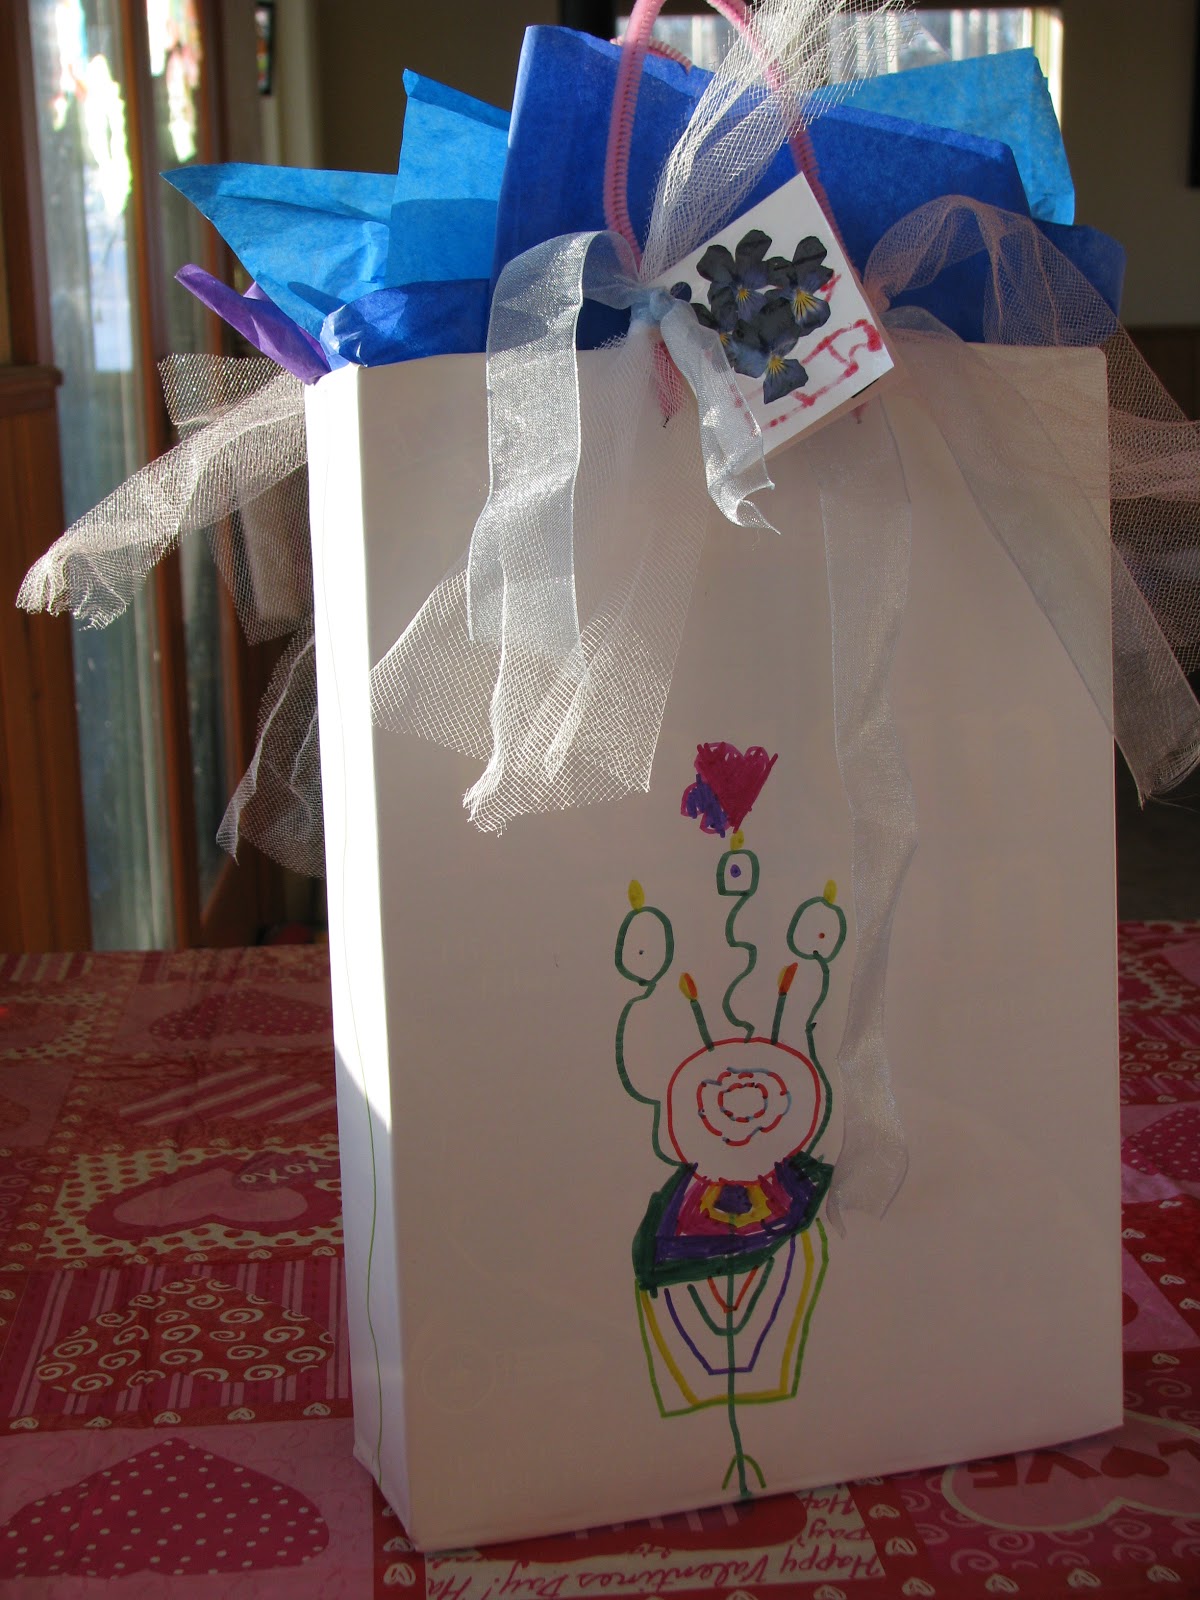
Upcycled Party Gift Box

We made this gift box for a friend's birthday party the other day. It is made from a cereal box. I have seen this done using gift wrap to cover a box. We covered ours with white contact paper and decorated it with permanent markers.
Cut the top flaps off a cereal box and wrap in contact paper.
Poke two holes on the top, both sides, for handles. We fastened a pipe cleaner handle to each side.
We tied tulle and ribbon to the handles to make it fancier, then Hollin drew birthday designs on each side with permanent markers.

We added the gift, which was a lovely assortment of art supplies, some tissue paper and a little card.
So sweet and personal. We gave new life to an old box, and saved $ on a gift bag.

Thursday, February 10, 2011

Valentine's Day Shirts

I had been planning to make doily print shirts with Hollin since I saw the idea a few weeks ago over at The Artful Parent.


While inking up the doily, we could not help but notice how nice the stencil effect of the doily looked on the paper underneath it, so very impulsively, we put the doily on the shirt and rolled over it.  I think it came out cute. It was hard to hold it perfectly still, but between the two of us we made it work. So instead of making doily prints, we ended up using the doily as a stencil.

I am not opposed to boys wearing hearts and pink, but I thought a pink doily shirt might be a touch too much. So, I jazzed up an old shirt with a cute boyish Valentine design using freezer paper stencils.
I really like heart art. There. I said it. We have been doing a lot of lately and I will try to get some more up before the big day.

Sunday, February 6, 2011

Painting in a Real Painting Studio

What's a mom with two sick kids to do on a cold Sunday morning?
They were not sick enough to stay home (or I was not willing to stay home another day), but sound way too terrible to go to church or to any other public place (really nasty cough). I am taking a painting class this sememster so I decided to take advantage of the big beautiful painting studio. I had some work to do and I figured we could bring some paints and let them get messy. They were so happy and had such a great time. We were alone the entire time we were there, three hours! I even got a good chunk of my own work done.
 I packed liquid watercolors, droppers, huge sheets of watercolor paper, salt, a spray bottle, shaving cream, trays and sponges. Snacks, drinks, and a portable dvd player ensured that after they painted, I would be able to paint.
 Hollin found a doillie and went right to work creating with it.
 They were all smiles and giggles. It was so nice to play and get messy with the materials and not worry about it. Waylon actually sang while he worked.
I usually do not give them such huge sheets of expensive paper, but once in a while it is nice to splurge. I just ordered some new art supplies for myself and felt I could part with two sheets.


 After a little while (or as Waylon would say, after a couple of whiles) the shaving cream got out of control as it always does. It was time to clean up and have a snack.
Creating art in a space designated for art making was a great experience for them. I know I work better when I am there. There is great light and so much to look at. Paintings everywhere, tools, strange things like bras dipped in plaster and plastic doll legs. What's not to love? I see this becoming a weekly adventure.

Thursday, February 3, 2011

Fleece Doggie Scarf

Recess at minus 20 can be pretty chilly with or without a good scarf. We rarely attempt it without and wanted to make something new and special. This was fast and came out really cute. My little sweet girl loves it and it gives her face a place to hide when it is really cold. I wish I had taken more pictures of the process, but I was on a role as it was a total impulse project on a school night.
 I did take this one picture once all the pieces were cut. There are two pieces for every one you see in the picture (2 bodies, 4 ears, 8 legs). As you can see it is a long body piece with the head and tail included . The legs and the ears are separate.
I stitched up the ears and legs first and turned them inside out. I put a tiny bit of stuffing into the legs. Next, I pinned them to the inside of the body (right sides together) and stitched the body leaving a place to turn the entire thing inside out. Hmm, I think I sewed the blue collar on before sewing up the long body pieces. Once it was all together I embellished it with button eyes, a nose and a pink heart.
Cute easy project. Fleece is perfect for this as it is so easy to work with, I find it is great for experimental projects. I can see making all sorts of animal scarves. The next one I plan to make is going to be a long tractor trailer for my truck lover.

Tuesday, January 18, 2011

Big Paper Snowflake

We get to enjoy making various types of snowflakes from October through April (hopefully not May...). This is one of our favorites.
We make one or two of these big beautiful snowflakes every year. You need 7 squares of paper, scissors, a pencil, and clear tape. We used white paper cut in 9" squares.
Fold in half to make a triangle, then in half again forming a smaller triangle.
With the open sides at the bottom, cut three lines, parallel to the long straight side, from the bottom, almost to the top (but do not cut through the top). Use the picture below as a guide. Draw first if that helps.
When you open it up, it should look like this. Now, repeat with the remaining 6 squares.
Now, you want to make each piece 3-dimensional. Take the top and bottom corner, bring them together and secure with clear tape. Then take the next top and bottom corners and bring them together on the opposite side and secure with tape. Looks like we started with the inside pieces...
It really does not matter how you start as long as you end up with seven pieces like the one pictured below.

Now line them up and tape the sides together so that they form a long line. We only have five lined up in the picture, just pretend there are seven.

Finally you want to tape the bottoms together so that it forms a round snowflake. As you can see, I took over at this point. It can be tricky getting the corners together.

These are beautiful in a classroom or a space that can accommodate a bunch especially if they are various sizes and colors.