Wednesday, April 4, 2012

I am Back

So it has been quite some time since I have paid any attention to Color Color Color. I suppose it is because I have been busy busy busy. I started this little virtual scrap book of creative endeavors as a way to keep track of the artsy things I do with my kids and to connect with others with similar ideas. I still wish to do that, but with a bit more. My kids have grown. When I started this blog my little girl was newly four and my baby boy was only one. He is now four and she will be seven in a few weeks. I was a stay-at-home-mom in Maryland. We now live in Alaska and I work part-time and have a first grader and a preschooler. I have also been able to make the shift in my creative outlet. It used to be that the only art I made was with my kids, in the past few years I have been making more and more of my own art again. I still make art with my kids, I hope that I always will. I imagine that I always will.
So, I guess what I am trying to say is that I want to "come back", but things might be a bit different. I am not even really sure in what ways.

This painting is my most recent large work. It is 40" by 36", oil on canvas. It was a commission. I really enjoyed working on this painting and was a little sad to see it go, although I know it is in a great home and is very loved. I painted it late at night in my kitchen after the kids went to bed while my husband watched some sci-fi show. I did not title it, but to me it exemplifies March. It is the view out my window. It is sunny and bright, yet snowy and cold.

Tuesday, June 7, 2011

Art in the Park

Waylon having a great time with the shaving cream--he still smells like Old Spice, even after a bath:)
What a beautiful day to get together with friends and make a huge artsy mess in the great outdoors. I wish I had more pictures, but I was so involved with the art making that despite the camera around my neck, I took only a couple of pictures. I will do better next week.
We made shaving cream prints and did some printing with gadgets and vegetables. For this we used tempera paint on black paper. Adding white to each color ensured that the colors stood out on the black background. All of our colors today were cool colors- blues, greens and purples. These Alaskan kids need strategies for cooling off when the temperature hits 70!
There were about 15 kids between the ages of 2 and 9, not to mention a few babies who were able to watch the fun.
The aftermath of the gadget printing station.

Saturday, April 9, 2011

Secret Messages

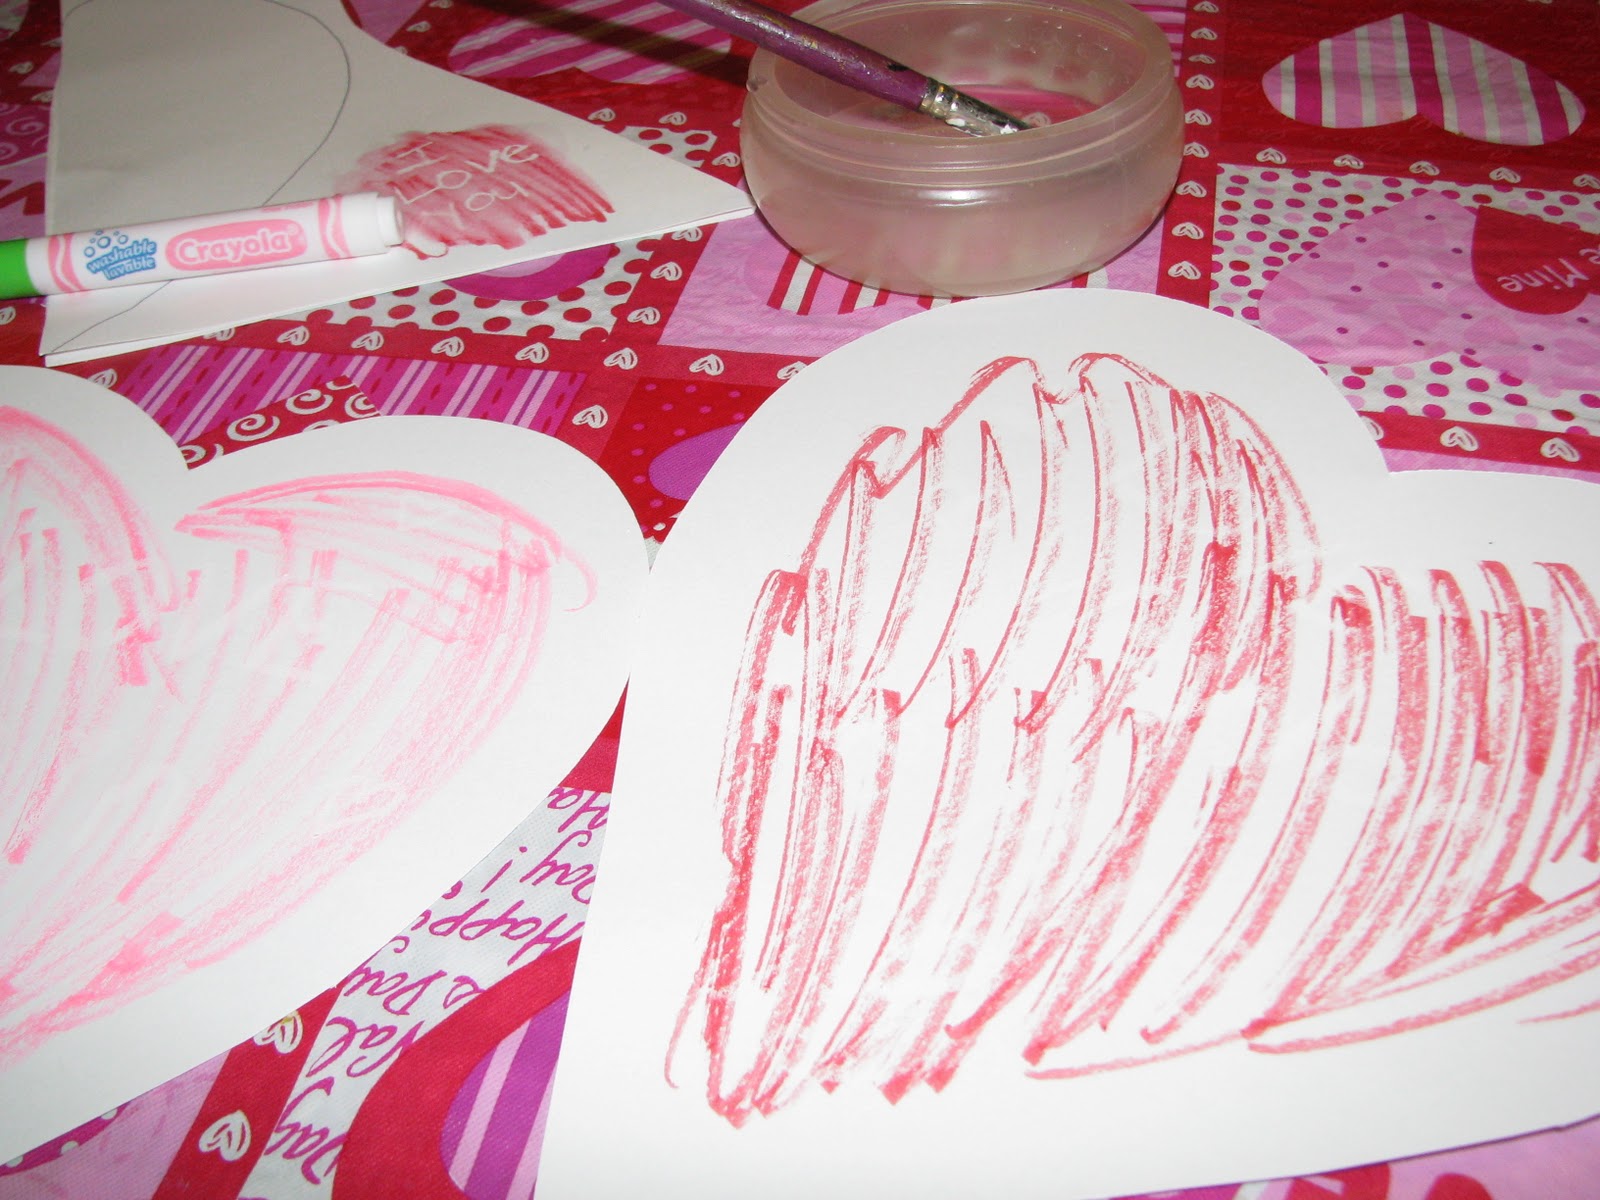
I know that Valentine's Day is over and we have moved on, really. But these secret messages that started out as Valentines have become so much more. We are hooked on making these and I think you might be too once you see how easy it is. All you need is heavy paper or card stock, a white crayon, a washable marker, water and a paintbrush.

Write a message or draw a secret picture with the white crayon on the white card stock. Gently color over the entire thing with a washable marker. Give it to a friend or anyone special and tell them to paint it with water to reveal the secret message.
 
The water blends the choppy lines and pops out the white writing.

Thursday, April 7, 2011

Bunny Chicks

I found an unfinished piece of wood cut in the shape of two bunnies at a thrift store the other day.
 I love what my almost six-year-old did with it. I had suggested that she use paint and she insisted on Sharpies. She was right. the colors came out great and she was able to get the details she was after. I love the way she made the bunnies peeking out of Easter eggs.
 Maybe she can do the back next year.

Tuesday, April 5, 2011

Plastic Lid Bunny Wreath

A few months ago I started a changeable wreath for our front door. The kids and I just got it ready for Easter. I cut the edge off two large 64oz plastic yogurt lids and cut out simple bunny shapes. Basically, a figure eight with ears. I cut 3 bunnies from each lid and made them various sizes. Hollin decorated their faces with colored sharpies. Waylon helped me cut ribbon. The ribbon just loops through the twigs and ties around the bunnies' necks, securing them to the wreath and giving them a bow tie at the same time.

I am very hoppy with the result (I could not resist).

Tuesday, March 8, 2011

The Days are Getting Longer


I spent every spare minute last month working on this oil painting. It is pretty big, 36" by 40". I suppose it is my interpretation of February in Fairbanks. Still so very cold and still, but the light is incredible. It is the month where, after so many months of cold and dark, you start to get a glimmer that spring may actually return. It is still cold, but the days are noticeably longer.

I will never tire of painting the trees in interior Alaska. Even around our 2 acre yard, the inspiration is limitless. The aspens and birches are all so unique and they change dramatically depending on the weather, the time of day and of course the seasons. I love to wander around and look for my next painting.


Saturday, February 26, 2011

Upcycled Party Gift Box

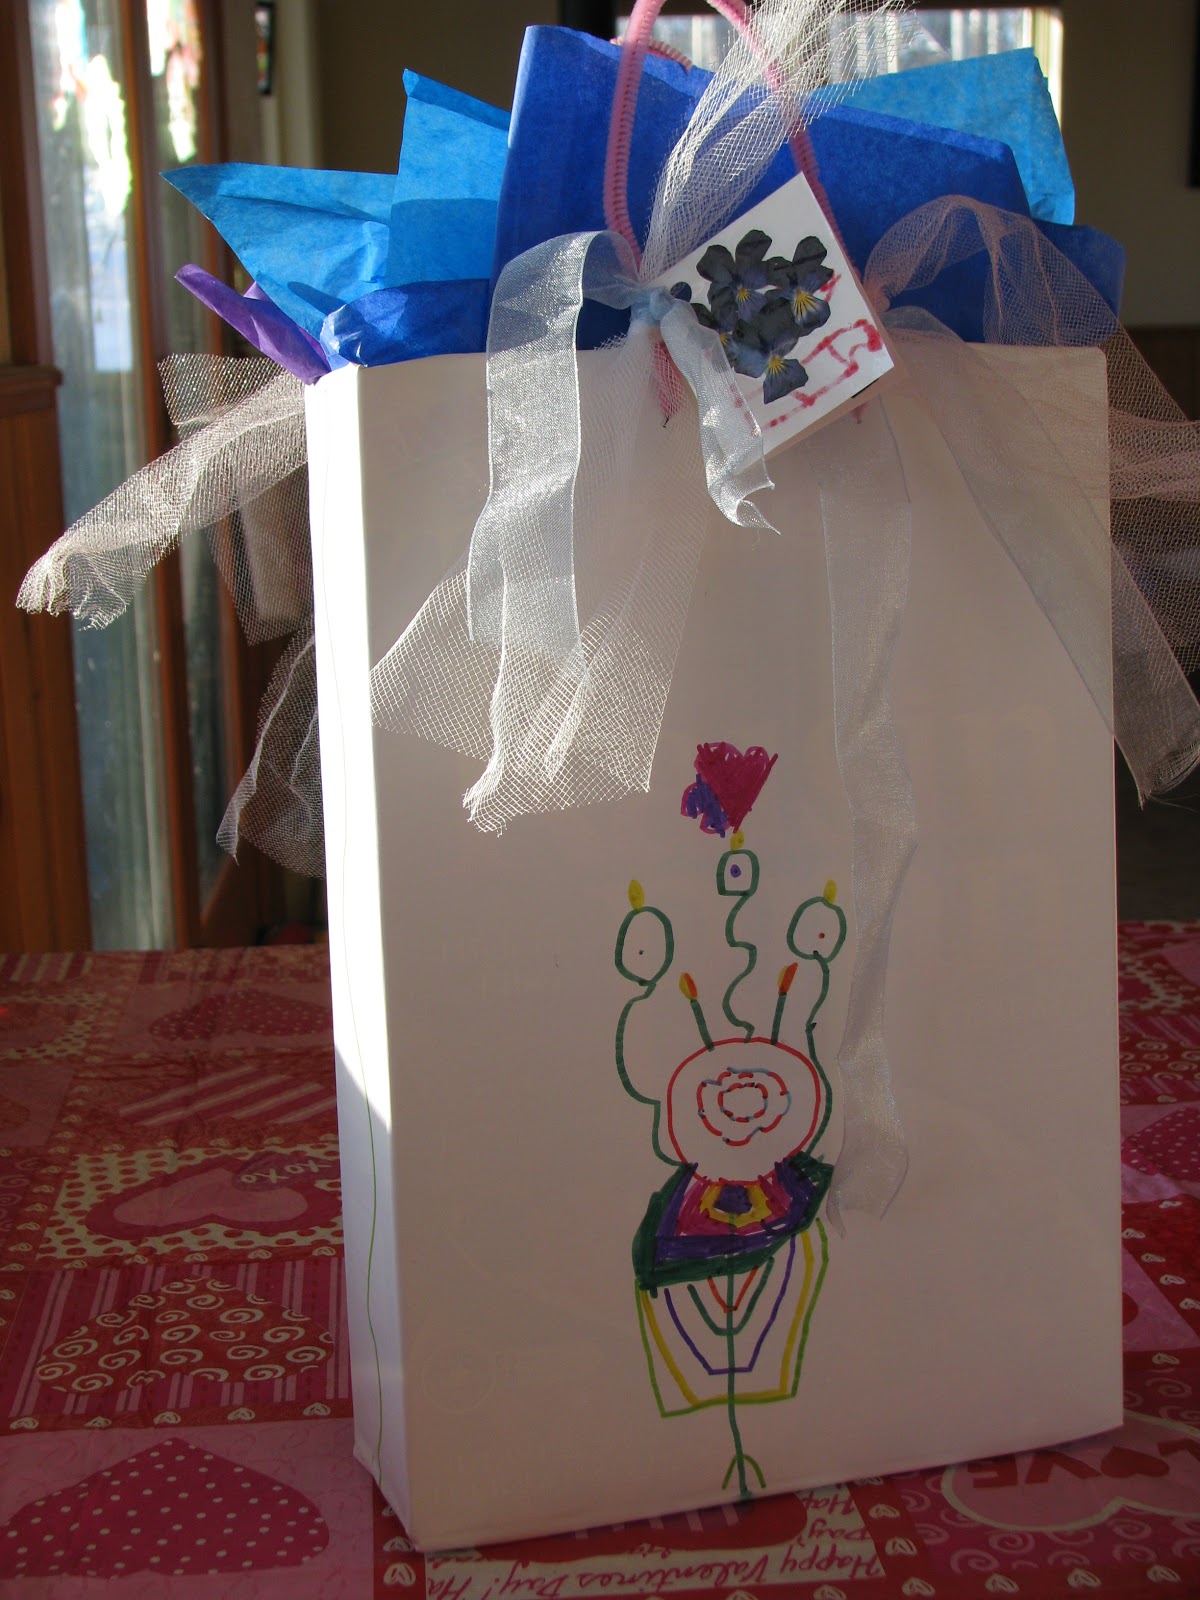
We made this gift box for a friend's birthday party the other day. It is made from a cereal box. I have seen this done using gift wrap to cover a box. We covered ours with white contact paper and decorated it with permanent markers.
Cut the top flaps off a cereal box and wrap in contact paper.
Poke two holes on the top, both sides, for handles. We fastened a pipe cleaner handle to each side.
We tied tulle and ribbon to the handles to make it fancier, then Hollin drew birthday designs on each side with permanent markers.

We added the gift, which was a lovely assortment of art supplies, some tissue paper and a little card.
So sweet and personal. We gave new life to an old box, and saved $ on a gift bag.

Thursday, February 10, 2011

Valentine's Day Shirts

I had been planning to make doily print shirts with Hollin since I saw the idea a few weeks ago over at The Artful Parent.


While inking up the doily, we could not help but notice how nice the stencil effect of the doily looked on the paper underneath it, so very impulsively, we put the doily on the shirt and rolled over it.  I think it came out cute. It was hard to hold it perfectly still, but between the two of us we made it work. So instead of making doily prints, we ended up using the doily as a stencil.

I am not opposed to boys wearing hearts and pink, but I thought a pink doily shirt might be a touch too much. So, I jazzed up an old shirt with a cute boyish Valentine design using freezer paper stencils.
I really like heart art. There. I said it. We have been doing a lot of lately and I will try to get some more up before the big day.

Sunday, February 6, 2011

Painting in a Real Painting Studio

What's a mom with two sick kids to do on a cold Sunday morning?
They were not sick enough to stay home (or I was not willing to stay home another day), but sound way too terrible to go to church or to any other public place (really nasty cough). I am taking a painting class this sememster so I decided to take advantage of the big beautiful painting studio. I had some work to do and I figured we could bring some paints and let them get messy. They were so happy and had such a great time. We were alone the entire time we were there, three hours! I even got a good chunk of my own work done.
 I packed liquid watercolors, droppers, huge sheets of watercolor paper, salt, a spray bottle, shaving cream, trays and sponges. Snacks, drinks, and a portable dvd player ensured that after they painted, I would be able to paint.
 Hollin found a doillie and went right to work creating with it.
 They were all smiles and giggles. It was so nice to play and get messy with the materials and not worry about it. Waylon actually sang while he worked.
I usually do not give them such huge sheets of expensive paper, but once in a while it is nice to splurge. I just ordered some new art supplies for myself and felt I could part with two sheets.


 After a little while (or as Waylon would say, after a couple of whiles) the shaving cream got out of control as it always does. It was time to clean up and have a snack.
Creating art in a space designated for art making was a great experience for them. I know I work better when I am there. There is great light and so much to look at. Paintings everywhere, tools, strange things like bras dipped in plaster and plastic doll legs. What's not to love? I see this becoming a weekly adventure.

Thursday, February 3, 2011

Fleece Doggie Scarf

Recess at minus 20 can be pretty chilly with or without a good scarf. We rarely attempt it without and wanted to make something new and special. This was fast and came out really cute. My little sweet girl loves it and it gives her face a place to hide when it is really cold. I wish I had taken more pictures of the process, but I was on a role as it was a total impulse project on a school night.
 I did take this one picture once all the pieces were cut. There are two pieces for every one you see in the picture (2 bodies, 4 ears, 8 legs). As you can see it is a long body piece with the head and tail included . The legs and the ears are separate.
I stitched up the ears and legs first and turned them inside out. I put a tiny bit of stuffing into the legs. Next, I pinned them to the inside of the body (right sides together) and stitched the body leaving a place to turn the entire thing inside out. Hmm, I think I sewed the blue collar on before sewing up the long body pieces. Once it was all together I embellished it with button eyes, a nose and a pink heart.
Cute easy project. Fleece is perfect for this as it is so easy to work with, I find it is great for experimental projects. I can see making all sorts of animal scarves. The next one I plan to make is going to be a long tractor trailer for my truck lover.

Tuesday, January 18, 2011

Big Paper Snowflake

We get to enjoy making various types of snowflakes from October through April (hopefully not May...). This is one of our favorites.
We make one or two of these big beautiful snowflakes every year. You need 7 squares of paper, scissors, a pencil, and clear tape. We used white paper cut in 9" squares.
Fold in half to make a triangle, then in half again forming a smaller triangle.
With the open sides at the bottom, cut three lines, parallel to the long straight side, from the bottom, almost to the top (but do not cut through the top). Use the picture below as a guide. Draw first if that helps.
When you open it up, it should look like this. Now, repeat with the remaining 6 squares.
Now, you want to make each piece 3-dimensional. Take the top and bottom corner, bring them together and secure with clear tape. Then take the next top and bottom corners and bring them together on the opposite side and secure with tape. Looks like we started with the inside pieces...
It really does not matter how you start as long as you end up with seven pieces like the one pictured below.

Now line them up and tape the sides together so that they form a long line. We only have five lined up in the picture, just pretend there are seven.

Finally you want to tape the bottoms together so that it forms a round snowflake. As you can see, I took over at this point. It can be tricky getting the corners together.

These are beautiful in a classroom or a space that can accommodate a bunch especially if they are various sizes and colors.

Sunday, January 16, 2011

Painting with Vroom Vrooms

"Vroom Vrooms" have been a huge part of our lives since Waylon was mobile enough to scoot to the stroller and try to spin the wheels. He takes them everywhere. He sleeps with them, eats with them, bathes with them and paints with them. Now every little guy (or girl) enjoys running a car through some paint to make tracks on the paper, but Waylon manages to do it regardless of my intention. I will set out paint and brushes, or paint and gadgets, or fingerpaints, etc. and he will somehow produce a car and start painting with it or painting it.


Washing the car in a tub of soapy water might even be more fun than painting it. Perfect for a cold January day.

Monday, December 13, 2010

Cutting Wheatgrass

Oh Color Color Color, I have missed you. I have been sewing, knitting, crafting, and painting so much that I have not wanted to take a break to tell anyone about it. In fact, with all the turkey art around here, I cannot believe I did not post anything for Thanksgiving. I feel like a squirrel, I have a huge storehouse of images stored up for the darkest days of winter. Actually, these are the darkest days of winter. It has been very cold and dark. This is the time of year that I am ready for dinner by 3:00 and want to go to bed at 5:00. We can always use a little something green and alive this time of year. That is why I like to grow wheatgrass. We plant it, watch it grow, care for it and trim it. There is just something therapeutic about cutting the blades with a pair of scissors.
To grow wheatgrass you simply press wheat berries into soil. Water it and watch it grow. It comes up in a couple of days and grows fast. I suppose we could juice it or eat it too. But for now we will just continue to play.


Thursday, November 11, 2010

Owl Cake

I made this cake a few weeks ago for a cake auction fundraiser at my daughter's school. It was so cute and easy...and it got lots of bids) I found an image of an owl cake and tried my best to copy. I should warn you, you will have to tilt your head to view the last two pictures. For some reason they will not rotate, but I think it is worth the neck stretch.
I made a chocolate cake using two round pans. I cut one piece to look like the tufts on the top of an owl's head.
White frosting for the face and belly....

...Chocolate frosting along the edges. The feathers are sliced almonds, the beak is a pecan. I dusted two dried pineapple rings with powdered sugar for the eyes and the eyeballs are chocolate covered almonds.


Enjoy!

Monday, October 25, 2010

Luminated 3-Dimensional Jack-o-Lantern

A few months ago a stumbled across this great idea via the Artful Parent for making a 3D contact paper stained glass sculpture. I applied that concept to make this little guy for Halloween.

I made a circle with 20 gauge wire in the size I wanted the jack-o-lantern to be. I cut a larger circle of clear contact paper-- large enough to fold the edges of contact paper around the wire and have some room to make it 3-dimensional. Clear packing tape was necessary to reinforce the seams.

I made a face using black yarn, but I think it would have been cuter to let the kids draw a face with a Sharpie (or the yarn--their faces are always better). They stuck bits of tissue paper on the sticky side. Then we stood it up and pushed the contact paper around until it was the shape we wanted and able to stand on its own. We put a little LED tea lite behind him and it glows beautifully.

The LED candles have been a major source of entertainment the last few weeks. The lights are always being turned off so they can set up the candles.

I had to include this photo of our huge sweetheart, JJ. Always involved in, even if oblivious to, the action around him. At one point he had about four candles on him before he looked up.